Feeds:
Posts
Comments

Posts Tagged ‘Savvy Entertaining’

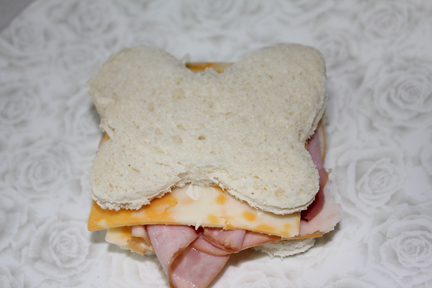
To finish up my week long Butterfly Party theme kick, here are a few more food ideas.

butterfly fruit salad finished

Butterfly Fruit Salad was super easy to make and looked pretty impressive.

butterfly fruit salad ingredients

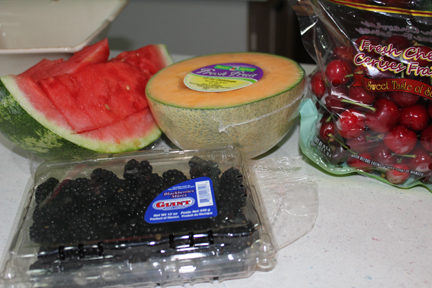
Ingredients included watermelon, canteloupe, cherries and blackberries but you could use whatever fruit you have on hand that is in season. You do need melon to do the butterfly cut-outs though.

butterfly fruit salad cut out melon

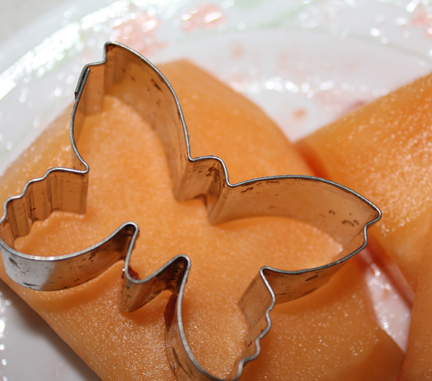
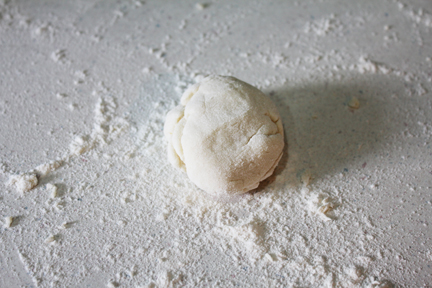
I peeled the melon and cut it into flat chunks about 1/4 inch thick then pressed in the cookie cutter. The cantaloupe is a little harder to cut, but totally worth the effort.

butterfly fruit salad watermelon cutout

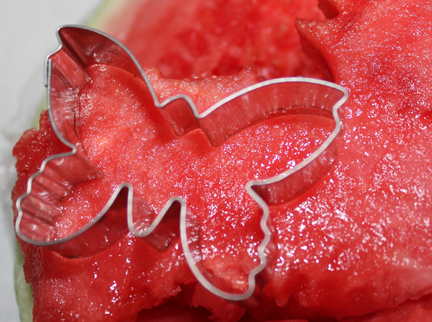
The melon is easy-breezy to cut into. I used two different sizes of cookie cutters.

butterfly fruit salad melons

And the result was a bowlful of fun butterfly shaped melon.

chocolate butterfly choc in bag

The last and final thing I served at the party was chocolate mousse cups with chocolate butterflies.

I used a mousse mix, but you can certainly make it from scratch of you so desire.

I melted a handful of chocolate chips and then spoon them into a ziploc bag with the corner cut off one end. Make the opening pretty small or you’ll have extra fat butterflies.

Pattern for the chocolate butterflies. Mine is a little freaky, so draw your own if you like.

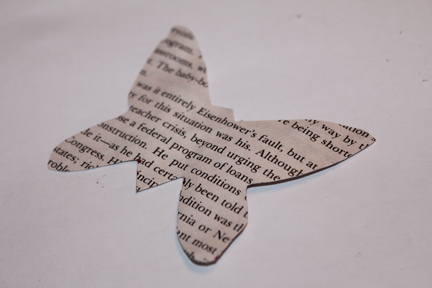
The pattern for the chocolate butterflies. Mine is a little freaky, so draw your own if you like.

chocolate butterfly on sheet

Place the pattern beneath a piece of parchment on a baking sheet. Using the chocolate, follow the lines of the pattern (or free-handing if you are talented like that. Sadly, I’m not.)

Freeze until firm (you can make these days ahead of time, if you like. Just don’t touch them any more than you have to. They are fragile and melt in no time flat.

chocolate butterfly in mousse cup

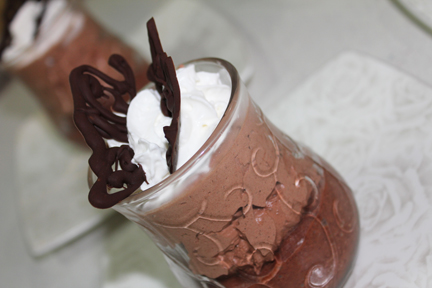
When you are ready to serve. Add a dollop of whipped cream to the mousse, remove the butterflies from the freezer then nestle into the whipped cream. A fun, whimsical way to end a party!

She Who Loves Butterflies

Read Full Post »

butterfly cookie white sparkle

Sticking to the Butterfly Party theme I began earlier this week, here are some food ideas I used for my party.

I’ll start with the sweet stuff and then get to the healthier options.

Use a basic sugar cookie dough,  from a package or homemade although I love this cookie recipe, and roll the dough about 1/3 an inch thick. Cut with butterfly shaped cookie cutters and bake until set but not quite done.

butterfly cookie frosting

Remove from oven and let cool completely then frost with a simple buttercream frosting.

butterfly cookie decor

Then you get to have fun decorating the cookies. Here are some of the things I used to bedazzle the cookies. If you haven’t tried it yet, the Color Mist spray from Wilson is like edible spray paint. It’s fabulous.

butterfly cookie pinkAnd it makes cool designs like this on your cookies and cakes.

butterfly cookie yellow

You can add whatever embellishments you like. I would have liked mine better if 1. I hadn’t been in such a hurry and 2. If my kitchen hadn’t been so hot. The frosting was melting faster than I could blink.

buttefly veggies lettuceI also attempted to make a butterfly veggie plate. You basically use leaf lettuce for the foundation and add whatever veggies you like in hopes it looks like a butterfly.

Someone with artistic talent would probably have much better luck than I did with this.

butterfly veggies

However, my guests were kind and pretended they could make this look like a butterfly. I, however, could not.

butterfly pasta with cheese

I also made a pasta salad using butterfly shaped pasta. Sorry, I forgot to take a photo of just the pasta. But the salad recipe is simple.

Pasta (cooked, drained and cooled)

Feta Cheese (1 cup)

Parmesan Cheese (1/4 cup)

Olives (I used a mix of black, manzanilla and Kalamata) (about 2/3 cup)

Caesar Vinaigrette Dressing (about 1 cup)

Mix and let sit overnight in your fridge before serving.

butterfly pasta salad with parmesan

It is super easy to make but looks and tastes like you’ve gone to a lot of work.

butterfly sandwich cut out bread

Our main dish was butterfly sandwiches (glamorous, I know!).

I used some old-fashioned white bread and a butterfly cookie cutter to cut out the pieces, then allowed the guests to put whatever they wanted on their sandwiches (assortment of meats and cheeses).

butterfly sandwich

And when they were done, they looked like this.

Tomorrow I’ll share a few more food ideas for hosting a fun butterfly themed party.

She Who is Practically Fluttering

Read Full Post »

I blogged yesterday about hosting a Butterfly Themed Party recently.

Not one to do things by half-measures, not only was the food and decor butterfly themed, but I insisted those attending join me for a butterfly craft.

I hadn’t tried it before, so it was a good thing the process was easy.

You basically need:

a book you don’t mind hacking to pieces

glue (school glue would work fine)

scissors

a marking pen

a butterfly cookie cutter

floral wire

wire cutters

butterfly craft cut outs on pageRip two pages out of the book and, using the cookie cutter, trace your butterfly patter on the page.

butterfly craft cutting out one

Cut out the pattern, making sure you cut both pages together.

buttterfly craft getting ready to glue

Open your butterfly, like you would bread for a sandwich. Measure two pieces of wire to lay cross-wise across your butterfly and cut them with wire cutters. Set the wire aside.


butterfly craft gluing sideLiberally apply glue to the edges of one piece of your butterfly.    Place the wire on the glue then lay the top piece on top of the wire (like you were making a butterfly sandwich with the paper and glue – in other words, make sure you get the inside pieces together so the edges match up.)

butterfly craft cut out

Let the glue dry…

butterfly craft finished 2

And then you can shape the butterfly however you want.

You can give it a light wash with water color, if you so desire, or poke a hole and tie a thread through it if you want to hang it. If you wanted to make dozens of these and string them together, they’d look really cool hanging from the ceiling.

Set these on a bookshelf, tuck into a corner. I bet if you make one, you’ll find yourself wearing a big ol’ grin when you look at it!

She Who Likes Wordy Butterflies

Read Full Post »

Let me start today’s recipe post by apologizing to anyone who is of Norwegian ancestry or has ever eaten Norwegian food prepared by someone who knows what they are doing.

That said, I decided a few weeks ago to make Lefse.

If you’ve never had it, think of a crepe made with potatoes.

Intriguing, yes?

The whole reason I wanted to make Lefse came about because the romance novel I’m working on right now features a Norwegian mail-order bride. She is a great cook and makes several Norwegian dishes, including Lefse in the story.

I thought it might be a good hands-on experience to attempt to make it myself.

Those who actually know how to make Lefse and do it the proper way have some special tools they use.

I made do with what I had.

I also feel the need to apologize for losing most of the photos I took while I was making it. Apparently, the computer gremlins deleted the file because I can’t find it anywhere.

Lefse Dough - roll it thin, super thin, before cooking.

Lefse Dough – roll it thin, super thin, before cooking.

If you have a griddle, fantastic, if not, I used a cast iron skillet with some oil to fry the Lefse.

If you have a griddle, fantastic, if not, I used a cast iron skillet with some butter or a dab of oil to fry the Lefse.

Golden brown and lovely. We sprinkled cinnamon and sugar on top and devoured. I'm blaming Captain Cavedweller for devouring so quickly, I didn't get any photos of the finished product on a plate.

Golden brown and lovely. We sprinkled cinnamon and sugar on top and devoured. I’m blaming Captain Cavedweller for devouring so quickly, I didn’t get any photos of the finished product on a plate.

Lefse

1 pound potatoes

1/4 cup unsalted butter, room temperature

1/4 cup heavy cream

1/2 teaspoon salt

1 1/2 cups all-purpose flour

Peel potatoes and cut into large, somewhat uniform chunks (the uniformity is challenging for me). Place in a saucepan and cover with cold water. Over medium heat, bring the water and potatoes to a gentle boil. Cook until potatoes are fork tender, about 10 minutes or so. Drain potatoes and transfer to a mixing bowl.

Using a potato masher (or ricer if you have one), mash the potatoes as thoroughly as possible – get out all the lumps. Cut the butter into small chunks and work into the potatoes. Add cream and salt. Keep mixing until teh butter and cream are completely absorbed.

Cover and refrigerate over night (or up to three days).

When ready to make the lefse, mix the potatoes with one cup of flour. Keep working it from the crumbly stage until it comes together in a ball. Turn onto floured counter and knead a few times. Roll into a thick log then divide into about a dozen even portions.

Roll each portion between your palms to form a ball. Set aside and cover with a clean dishtowel.

Heat a griddle or cast iron skillet with just a little dab of butter on medium heat until a bead of water sizzles when flicked on the pan.

Roll one of the rounds of dough using a rolling pin dusted with flour. Roll the dough out into as thin a circle as possible. Flip the dough as you are rolling to keep it from sticking to the counter. Use more flour as needed on the counter and pin as needed.

When the lefse is as thin as you can get it, roll it onto the rolling pin (like transferring pie dough) and place it in the skillet. Cook for a minute or so on each side, until brown and lovely. Transfer to a plate and cover with another dish towel.

While one lefse is cooking, roll out the next.

You can eat lefse with jam, peanut butter, cinnamon and sugar, berries and whipped cream, whatever tickles your fancy.

She Who Liked Lefse

Read Full Post »

« Newer Posts - Older Posts »