Feeds:
Posts
Comments

Archive for April, 2011

As I mentioned yesterday, I spent the weekend giving our bedroom a complete makeover. It was a lot of fun and more work than I anticipated. I’ve got five blisters to prove it!

The inspiration for my madness, I mean creativity, came from a Private Quarter’s party I co-hosted with my friend Colleen. Once I received all the beautiful new pieces I ordered I knew I needed, wanted, to update the bedroom before I put them to use.

Today I’ll show you the paint process I went through on the walls and tomorrow check back in to see the finished room.

So this is what the room looked like when I started the project. The walls were sponged a mixture of cream and white with a cream quilt, cream drapes, cream runner on the dresser, and lots of cream accents.

Did I mention the cream? There was quite a bit of it.

Stripped down, here is what the room and walls looked like. Please ignore the dirty window. I generally do.

The walls already had this great knock down texture, which I love. It adds depth and character and goodness knows we need all the character we can get.

These are the colors I decided to use in the bedroom – Cinnamon Spice and Cafe Latte – which is now making me hungry. Quite a change from cream, huh?

Here you can see the colors right in the can.

With the great texture on the walls, I decided to use a method of painting that would really highlight all that wonderful texture.

It is called The Woolie 2 Color Paint Roller System. I used it with success a few years ago when I spent three days stripping hideous wallpaper out of our guest room and painted the walls a rich golden color. I don’t remember where I purchased The Woolie, but you can find it at Amazon.
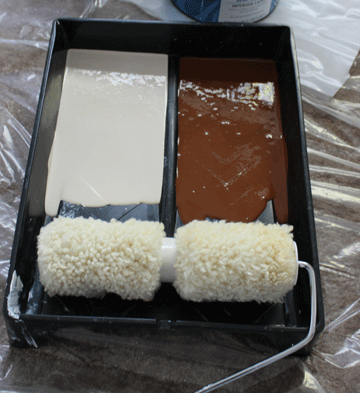
The way The Woolie works is the roller is big and thick and, get this… wait for it… Woolie,  and is split in two. You pour the two colors of paint of your choice in the split tray and get to work. When you are selecting paint colors, decide what overall color you want to go for and then choose paint both two shades lighter and two shades darker. I know it sounds crazy, but it works!

So here is what the first roll of paint looked like on the wall. Sorry the photo isn’t crisp. It was challenging to take photos, work, and keep the camera out of the paint all at the same time.
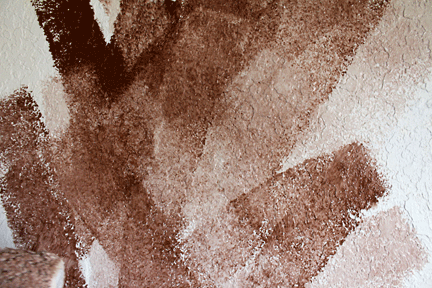
This shows the colors starting to blend. The beauty about this system is that you can slap the paint on any ol’ direction and the more random you are, the better it looks. That is totally my way to paint, because I usually slap the paint on going whatever direction strikes my fancy and my walls completely show my inability to paint in a straight uniform manner.
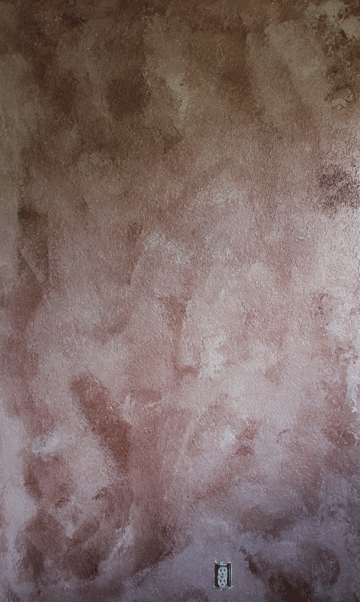
Here is one wall completed. You can see the great blending of colors and all the fantastic texture.

Check out the finished walls in the room. Quite a contrast to cream, cream, cream.

Tomorrow, I’ll share the redecorating portion of the room.

She Who Hates to Paint

Read Full Post »

I spent the weekend giving our bedroom a much needed makeover. I’ll post some photos later this week.

Today, I wanted to share some quick and savvy tips for updating your home decor.

Bed Linens

Create a whole new look by making a duvet.  Place two flat sheets back to back, and sew around the perimeter, allowing for a half-inch seam. Leave an opening at the bottom. To close, sew twill-tape ties or velcro tape to the inside edges. You can also use the same sheet pattern or a contrasting design for your sheets, add some throw pillows and enjoy the new look.


Window Treatments

Lighten up any room by removing heavy drapes or window coverings. Wash the windows then add back breezy curtains or drapings. Flat sheets can also be used for curtains. Look for curtain hooks that clip on to the fabric or use bias tape or ribbon to create tabs on top of the sheets.


Lighting

Remove lamp shades from lamps, wipe off light bulbs with a microfiber cloth, dust lamps and then clean the shades. Use a soft brush attachment with your vacuum and run up and down along the shade. If you don’t have a vacuum attachment, a soft brush will do. Remember to wipe down the inside of the shade as well. If the shade was rips or stains, think about investing in a new one.


Pops of Color

Nothing chases away the winter blahs and screams spring like bright colors. Three of the most popular this spring are green, orange and bright pink. Add a vase of orange flowers or a throw pillow in hot pink and you have created an instant “welcome spring” message for your guests.


Whimsy

Have fun with your spring decor and add unexpected elements. A vase filled with bright kumquats can hold a bouquet of daffodils. Limes and hot pink flowers are so fun together in a centerpiece. Use wall decals to brighten up a wall, cupboard or even a piece of wooden furniture.

Just add a few touches here and there and soon your house will be singing spring!

She Who is More Than Ready for Spring to Stay Sprung


Read Full Post »

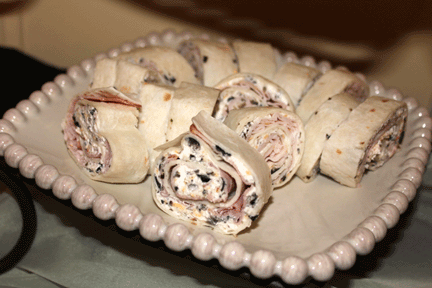
Tortilla Roll-Up Appetizers

If you want a simple appetizer that people absolutely can’t stay away from, try this easy recipe. I’ve made it countless times over the years and never have any leftovers.

Warning – we absolutely will not talk about the caloric content of this recipe! And don’t go all healthy-substitute crazy on me here. You have to follow the recipe or it just doesn’t taste right!

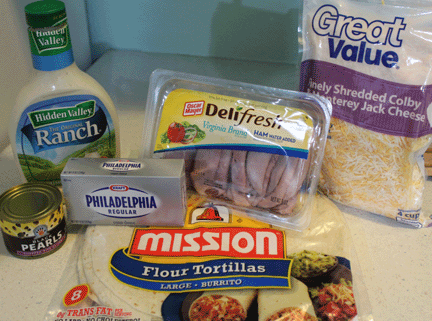
Ingredients

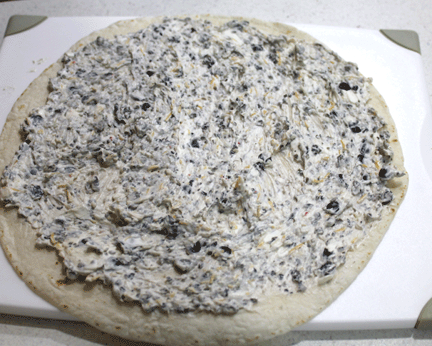
Mix up your filling. I know it looks a little... um... interesting.

Please don't be like me and absentmindedly put the meat on first then try to spread filling over the top. Put the filling on the shell, then layer on the meat!

Filling spread out on the shell, then add the meat.

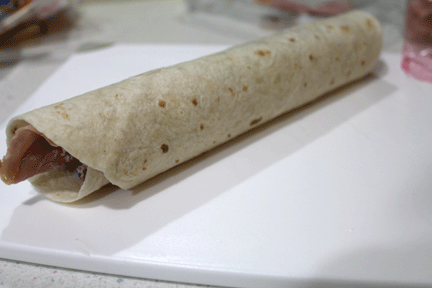
Roll it up tightly.

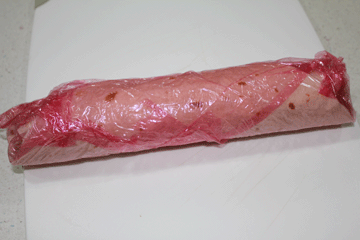
Wrap tightly in plastic wrap and let set in the fridge for several hours or overnight. The longer it rests, the better the flavor!

Unwrap, slice and enjoy!

Tortilla and Ham Roll-Ups

4 large flour tortilla (or 6-8 smaller ones)

1 large package cream cheese, softened

1/2 cup grated cheddar-jack cheese

1 small can chopped olives

1/4 cup ranch dressing

1 package of ham lunch meat, thinly sliced

In a bowl, combine cream cheese, cheddar-jack cheese, ranch dressing and olives. Mix well then spread over tortilla, going almost to the edges.

Layer on ham then tightly roll up tortillas. Wrap in plastic wrap and refrigerate for several hours or overnight. When you are ready to serve, unwrap, slice into about 1/2-inch wide slices and stand back. You don’t want to get trampled by the crowd as they hurry to devour these. (Unless Captain Cavedweller is there, in which case, linger all you want, he ain’t eating these!).

Happy Entertaining!

From She who Loves Roll-Ups way too much!

Read Full Post »

« Newer Posts